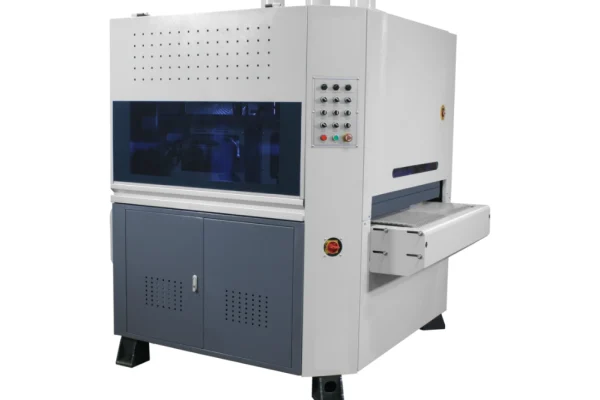
Cabinet door sanding has traditionally required extensive handwork, skill, and time. Modern cabinet door sanders have reshaped this process by reducing manual sanding while delivering more consistent, finish‑ready surfaces. For shops that are aiming to improve quality and throughput, the Stanza SB Series optimizes finishing operations.
Why Proper Sanding Matters
Proper sanding is one of the most important steps in achieving a high-quality finish. Whether applying stain, sealer, primer, or paint, the surface must be properly prepared to achieve coating adhesion and a smooth, professional appearance. However, manual sanding is labor-intensive and can be inconsistent. Automating the process helps to standardize results across a wide range of styles and materials, resulting in reduced labor and operator fatigue, smoother edges and profiles, increased production, better coating adhesion, and higher quality finish results.
Inside the Stanza SB Series: How our Sanding Stations Work
The Stanza SB Series uses dual sanding stations designed to reach every part of a cabinet door.
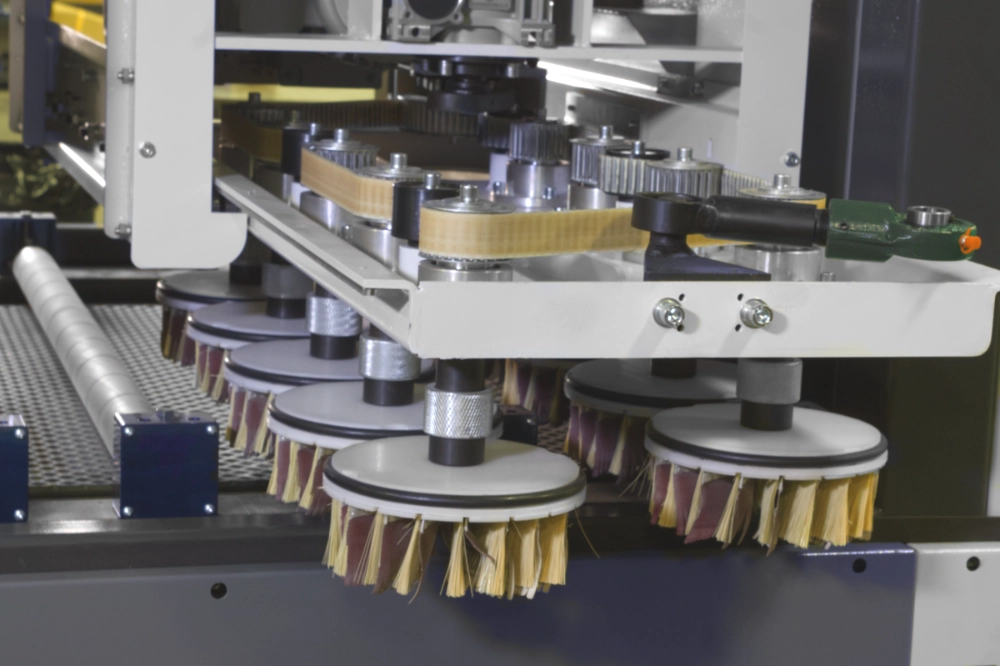
The disc sanding station rotates and oscillates into recessed areas of the workpiece, including inner profiles and lower sections of cabinet doors and face frames. It is designed to sand detailed contours, remove raised grain, smooth interior corners, create a uniform scratch pattern, and ease sharp edges for improved finish acceptance.
The cylinder flap station rotates and oscillates across the top rails and stiles of the door to blend and feather the scratch pattern created by the disc station, smoothing transitions across profiles, further easing edges and corners, and producing a more uniform sanding result.
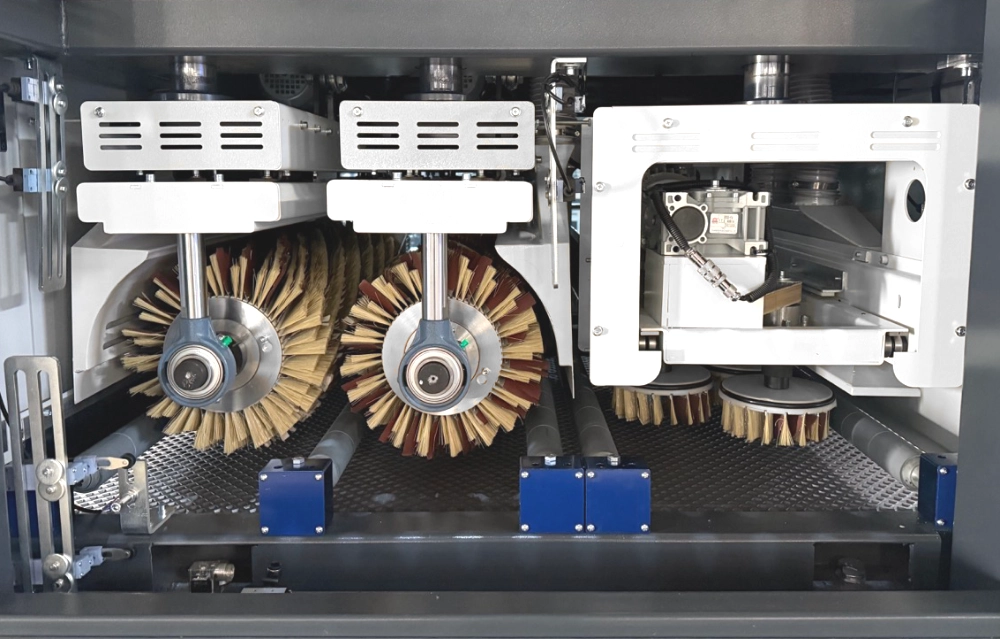
Utilizing this combination accomplishes better results by achieving a uniform sanding that prepares the door for finishing with minimal manual touch‑up.
The 2-Stage Sanding Process
Stage 1: Whitewood (Raw) Sanding
Whitewood sanding is the foundation to a high-quality finish. During this stage, the cabinet door sander removes raised grain, cleans up routed profiles and corners, softens sharp edges, improves surface consistency, and prepares the substrate for optimal coating adhesion.
Proper edge easing is particularly important because coatings tend to pull away from sharp corners. By gently rounding these edges, manufacturers can achieve more durable and consistent finish coverage.
After the first pass, operators typically will perform a minor touch‑up on any tight interior corners that the machine may have missed. This is a normal part of the process.
While machines dramatically reduce handwork, they can’t eliminate it entirely. Wood species, MDF density, tooling, and upstream processes all have an effect on the final result.
Stage 2: Primer/Stain/Sealer Sanding
Once the first coat of primer, stain, or sealer has been applied and cured, a second sanding operation is typically performed; this is a light scuff, not a heavy cut! The goal is to create a fine scratch pattern, not to remove any material. This aids in adhesion between coats, removes minor imperfections, improves final finish smoothness, and maintains edge integrity.
Most manufacturers will use higher grit abrasives, faster conveyor speeds, and reduce sanding pressure. These adjustments help to prevent burn-through while creating an ideal surface for subsequent finish coats.
How much Hand Sanding is Reduced and why Grit Selection Matters
On average, a cabinet door brush sander drastically reduces handwork by 75-90% on the Whitewood/Raw stage and by 80-95% on Primer/Sealer coats. These are rough percentages and the actual amount may vary based on substrate preparation and manufacturing processes occurring upstream, such as tooling, widebelt sequence and wood type. Abrasive grit also factors into the final result.
Lower grits will remove material more aggressively and are useful for heavy stock removal, grain knockdown and profile cleanup, but excessive pressure can leave deep sanding/scratch marks and cause round over.
Higher grits create a finer sand/scratch pattern, but if not used with enough pressure it can lead to burnishing/polishing of the piece, which can cause coatings to fail to adhere.
A sanding machine operator decides the optimal settings and grits to use when using the brush sander. The speed of the abrasive head, rotation, and down pressure are all variable on the Stanza Cabinet Door Sander. A series of disc or flap station wheels are used in combination to create the desired outcome.
Why the SB Series Works for Any Shop
The Stanza SB Series is designed for both inline and stand‑alone use, making it suitable for:
- Small custom shops
- Mid‑size production facilities
- High‑volume manufacturers
Its flexibility, ease of adjustment, and consistent results make it a dependable solution for improving finish quality while reducing labor costs and operator fatigue.
Frequently Asked Questions
What does a Cabinet Door Sander do?
A cabinet door sander automates edge easing, profile sanding, and surface preparation for cabinet doors before and after finishing applications.
Can a Cabinet Door Sander reduce hand sanding?
Yes. Most cabinet door brush sanders reduce manual sanding by 75% to 95%, depending on material type, tooling quality, and abrasive selection.
What is Whitewood sanding?
Whitewood sanding is the preparation stage before stain, primer, or sealer is applied to raw wood cabinet components.
What is Primer or Sealer coat sanding?
A light scuff between coats to promote adhesion.
What grits should be used on a Cabinet Door Sander?
Lower grit abrasives remove material more aggressively, while higher grits create lighter scratch patterns for finish adhesion. Proper grit selection depends on the coating characteristics and substrate quality.